WSL 深度学习总结
环境安装
下载 Anaconda for Linux
使用
cd指令转到下载文件夹,输入如下指令安装 Anaconda1
bash Anaconda3-<版本>-Linux-x86_64.sh
在 WSL 中, Windows 系统文件保存在
/mnt文件夹下, C 盘对应文件夹/mnt/C配置环境变量
输入如下指令,编辑 profile
1
sudo vim /etc/profile
在文件的最底端,添加如下代码
1
export PATH=<Anaconda Adress>/bin:$PATH
输入如下指令,重新加载环境变量
1
source /etc/profile
构建 Anaconda 环境
输入以下指令创建新 conda 环境
1
conda create -n <Environment Name> pip python=<Python Vertion>
输入以下指令激活 conda 环境
1
conda activate <Environment Name>
使用
pip install指令或conda install指令安装环境所需模块
环境安装参考网页
萝北村的枫子 - Ubuntu 安装 Anaconda 详细步骤
文艺圈不知名刘先生 - WSL 安装 Anaconda
阿柴 - 从零开始的 WSL 深度学习环境配置
Lyle Chen -基于 WSL 搭建深度学习开发环境
Point Net 在 WSL 上复现
根据作者在 GitHub 上的信息构建环境
Installation Install TensorFlow. You may also need to install h5py. The code has been tested with Python 2.7, TensorFlow 1.0.1, CUDA 8.0 and cuDNN 5.1 on Ubuntu 14.04.
创建 python 2.7 conda 环境
1
2
conda create -n pointnet pip python=2.7
conda activate pointnet在 conda 环境中安装下列模块
- TensorFlow
- Matplotlib
- Pillow
- SciPy
- h5py
- PIL
即输入如下指令
1
2
3
4
5
6
7
sudo pip install h5py
conda install h5py
conda install tensorflow-gpu=1.0.1
conda install matplotlib
conda install pillow
conda install scipy
conda install PIL下载 modelnet40_ply_hdf5_2048 解压到
pointnet-master/data文件夹下输入如下指令,执行 train.py
1
python train.py
train.py 中默认训练 250 epochs , GTX 1060 训练 110 epochs 需要 40 小时,而在 80 epoch 时,训练结果已收敛,若只是复现可以略微减少训练轮次 输入
python train.py --epoch <epoch>即可调整最大训练轮次train.py 运行结果片段
1
2
3
4
5
6
7
8
9
10
11
12
13
14
15
16
17
18
19
20
21
22
**** EPOCH 100 ****
----0-----
mean loss: 0.147063
accuracy: 0.951593
----1-----
mean loss: 0.169319
accuracy: 0.939941
----2-----
mean loss: 0.155273
accuracy: 0.940430
----3-----
mean loss: 0.176028
accuracy: 0.940918
----4-----
mean loss: 0.156226
accuracy: 0.941406
----0-----
----1-----
eval mean loss: 0.564006
eval accuracy: 0.874188
eval avg class acc: 0.844451
Model saved in file: log/model.ckpt输入如下指令,进行测试
1
python evaluate.py --visu
测试结果
1
2
3
eval mean loss: 0.535309
eval accuracy: 0.880875
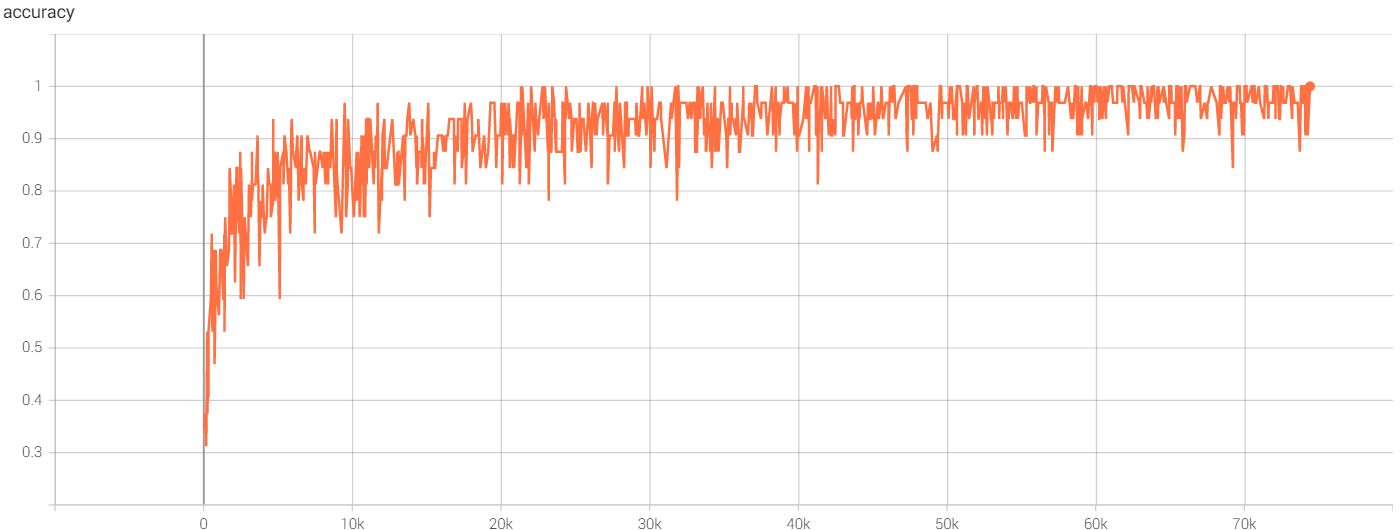
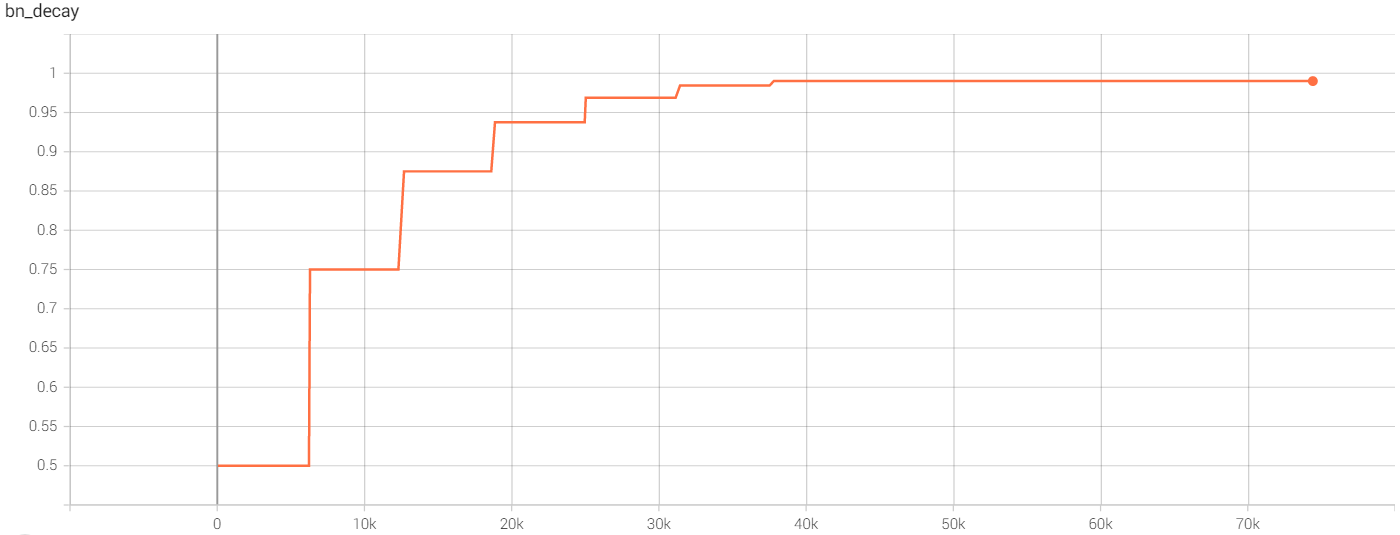
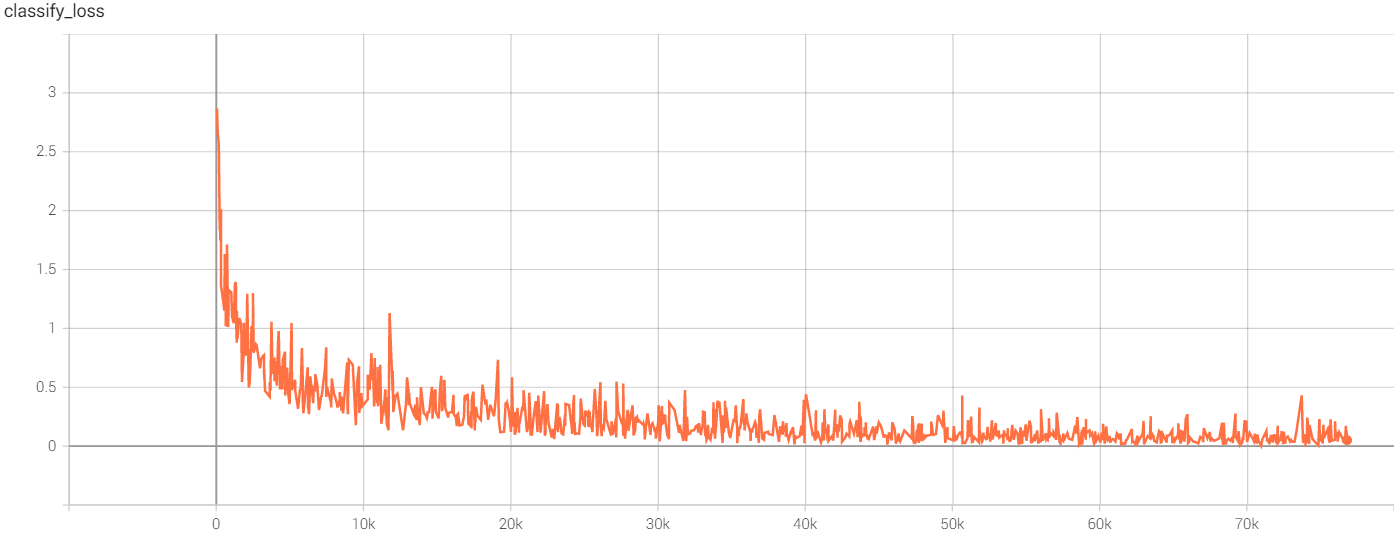
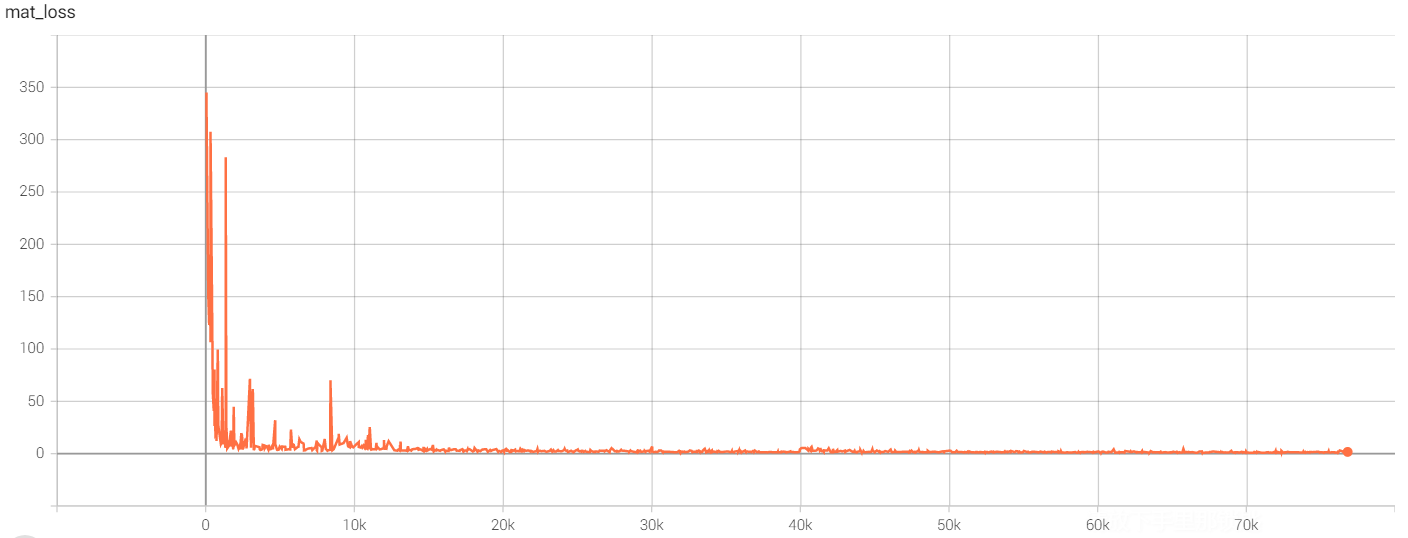
eval avg class acc: 0.852448输入如下指令,在 TensorBoard 中查看训练历史
![accuracy]()
![bn_decay]()
![classify_loss]()
![loss]()
![mat_loss]()

Point Net 在 WSL 上复现参考网页
YQ8023family - PointNet 复现
Point Net 在 WSL 上复现遇到问题
在进行训练的时候,检查 Windows 系统任务管理器,发现 GPU 使用率基本为 0%,即没有使用 GPU 加速,且运行速度较慢
可能的解决方法:
- 在检查环境的时候发现没有安装 cudnn ,怀疑可能是缺乏该模块影响了训练速度,稍后安装好后再进行尝试
- 改用服务器进行训练,服务器的显卡比本机好,运行速度较快(GTX1060)
后续解决:
- 在输入指令
conda install cudnn安装 cudnn 后,再次执行train.py文件,发现已经可以调用核显(Intel® UHD Graphics 630)的 GPU ,但是独显的 GPU 使用率依旧为 0%
后续可能的解决方法:
在检查train.py文件默认参数后发现,程序默认使用 GPU 0,即本机的核显,使用指令python train.py --gpu 1执行可使用本机独显- 经咨询后使用
nvidia-smi指令查看显卡,发现只有独显 GTX 1060,即不存在 GPU 1
最终解决方法:
- 输入
conda remove tensorflow指令移除 TensorFlow 库,输入conda install tensorflow-gpu==1.1.0安装 TensorFlow-GPU 库
事后追因:
- 安装环境时输入指令
nvidia-smi检查驱动,发现CUDA Version: 11.7且Driver Version: 516.94就没有去安装 cudnn - 安装 TensorFlow 时,一开始有考虑安装 TensorFlow-GPU 版本,但是想着尽量和作者要求的版本一致,然而并不存在 TensorFlow-GPU 1.0.1 版本,最终安装了 TensorFlow 1.0.1 版本
总结:
- 安装环境时优先安装 cuda 、 cudnn ,若需要安装 TensorFlow 库时,优先安装先进版本的 TensorFlow-GPU 库
WSL 上安装的 Ubuntu-22.04 LTS 因无法安装图形化界面,无法显示分类失败的图片,也没法通过输入
tensorboard --logdir log后打开 http://localhost:6006 查看训练过程可能的解决方法:
- 将训练后整个文件夹复制到 Windows 硬盘上,在 Windows 系统下查看
- 后续实验发现,在 Ubuntu-20.04 LTS 系统上可以实现图形化界面,也可尝试在该系统上进行论文复现
在执行 train.py 文件时,弹出错误信息
1
Could not identify NUMA node of /job:localhost/replica:0/task:0/gpu:0, defaulting to 0. Your kernel may not have been built with NUMA support.
翻找 TensorFlow 源码后找到弹出错误信息的原因
For some reason the StreamExecutor couldn’t get the NUMA affinity of the GPU. If this is not a multi-socket mobo with GPUs local to different buses, it doesn’t matter. If it is, we may run into trouble later with data transfer operations. The trouble may manifest as slower than expected performance, or outright failures.
最终处理是忽略该错误信息
解决问题参考网页
小白的2015 - NUMA support